VPNとは?VPN仮想プライベートネットワークのメリットとデメリット

VPNとは何か、そのメリットとデメリットは何でしょうか?WebTech360と一緒に、VPNの定義、そしてこのモデルとシステムを仕事にどのように適用するかについて考えてみましょう。
Remote computer access can be highly beneficial both in your personal life and your business endeavors. You can use this handy option to quickly find an important file from the office computer or solve a problem for your less tech-savvy friends.
If TeamViewer is your software of choice, you might be wondering how you can make this remote control possible. Keep reading to learn how to add a computer to TeamViewer and access it with or without a password.
How to Add a Computer to TeamViewer
There can be multiple devices under your TeamViewer account. Once you add a new device to your account, you can manage and monitor it remotely at any time.
Adding a new computer to your TeamViewer account is fairly straightforward and similar across all platforms.
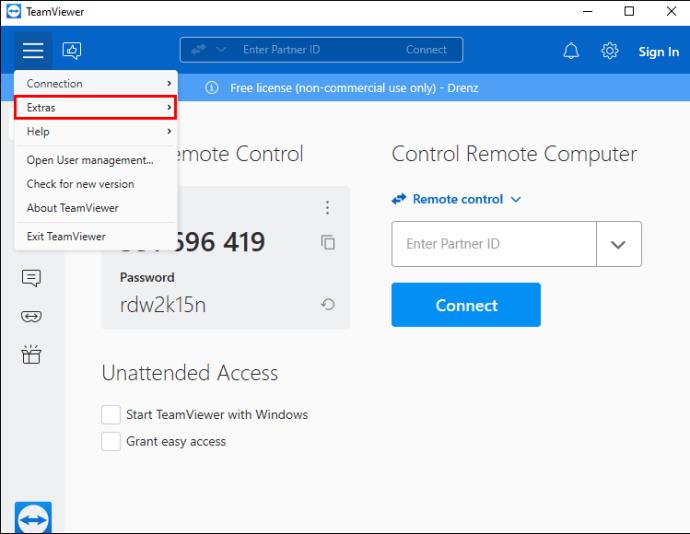
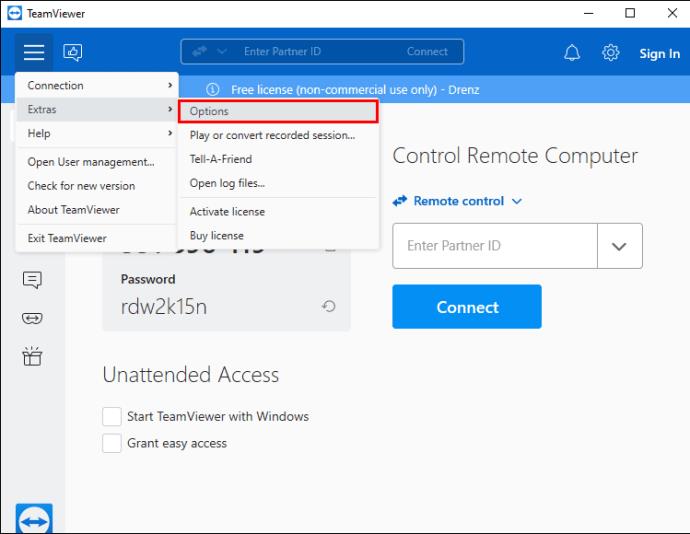
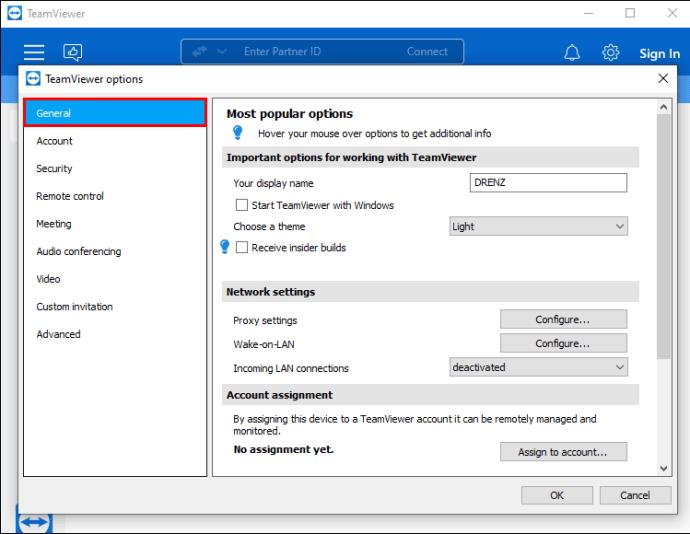
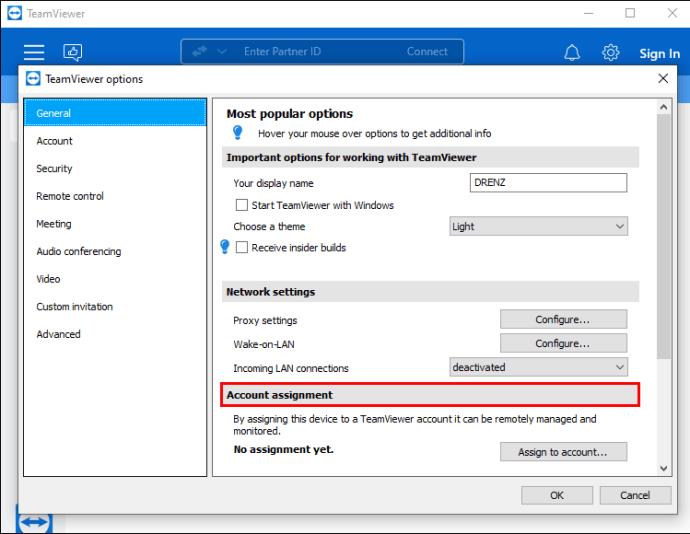
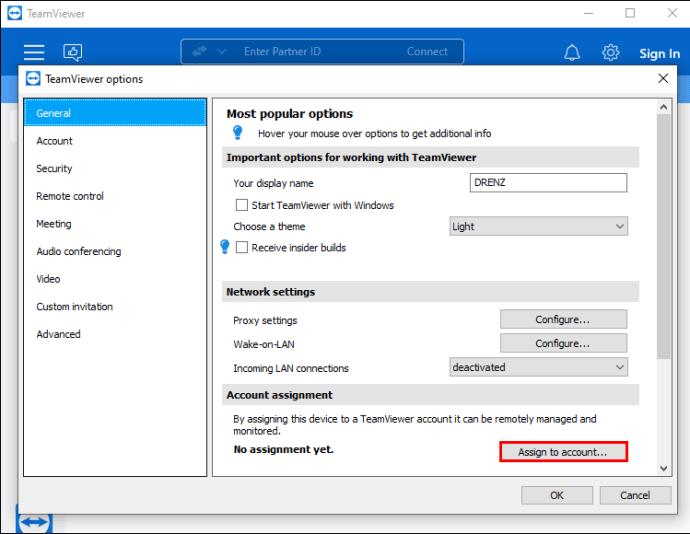
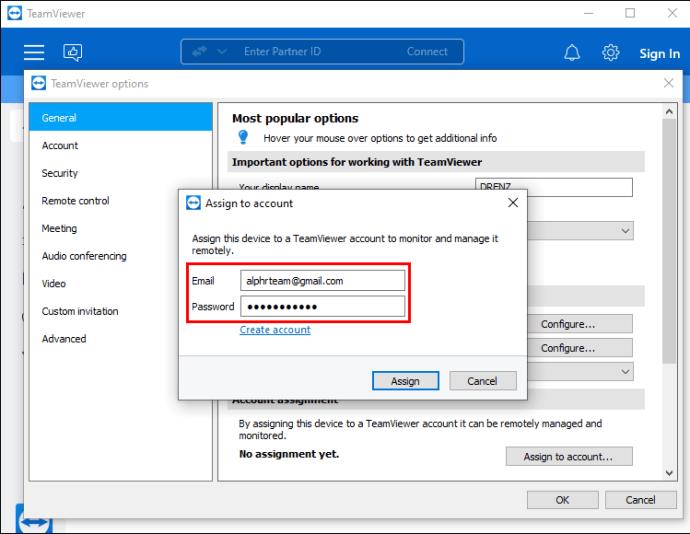
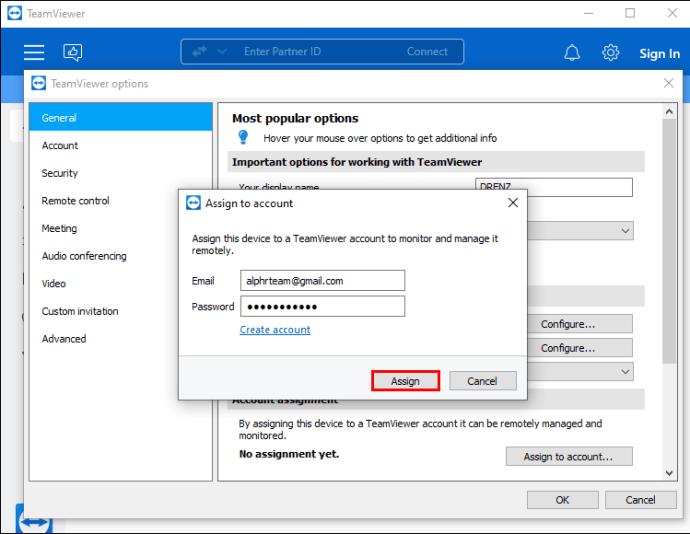
Each time you add a new device to your TeamViewer account, you’ll have to authorize it. If this is the first time you’re using your account credentials on this device, you’ll need to add it to your Trusted Devices list.
After entering the log-in details for the first time, a pop-up window will appear. The pop-up will inform you that a confirmation email has been sent to your email address. The email will contain a device authorization link valid for 24 hours.
To authorize the new device, navigate to your email account and click on the link within the received email. Once you click on the link, the TeamViewer Management Console will open.
You can complete the authorization process in the console by selecting the trust scope you’d like to grant to the device. To do so, navigate to the drop-down menu under the “Do you want to trust this device or the IP address permanently?” question. Click on the down-arrow to expand the options and choose one of the following.
Once you select the desired option, tap “Trust” to complete the process. After seeing the “Device successfully added” message, you can sign in using the new device.
How to Add a Computer to TeamViewer Without a Password
When you’re connecting to a new device via TeamViewer, you’ll typically need to enter a password to authorize the connection. Although this feature is put in place for security reasons, there are situations when it isn’t needed. In fact, if you need to access a computer quickly when no one is present on the other side, the password can be a hindrance.
Fortunately, TeamViewer offers an option to connect to a device with no personal or random password required. This feature is called Easy Access. Once activated, all you need to do is log in to your account and access the desired device.
Before activating Easy Access, ensure that the device you want to connect to is assigned to your TeamViewer account. After that, follow these steps to enable Easy Access:


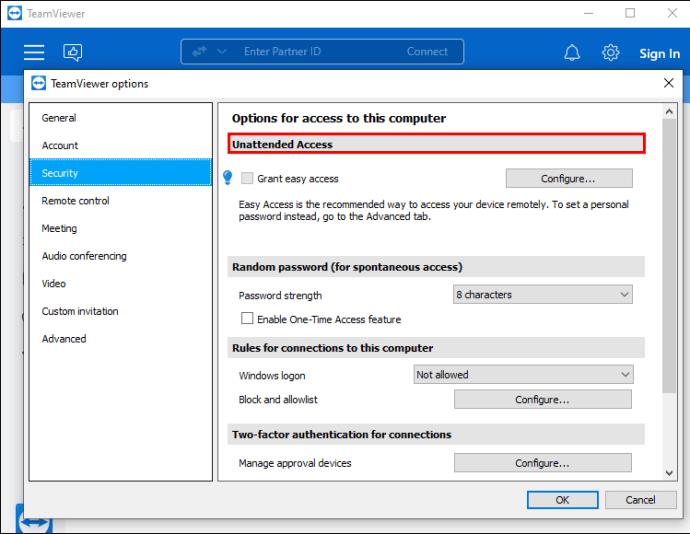
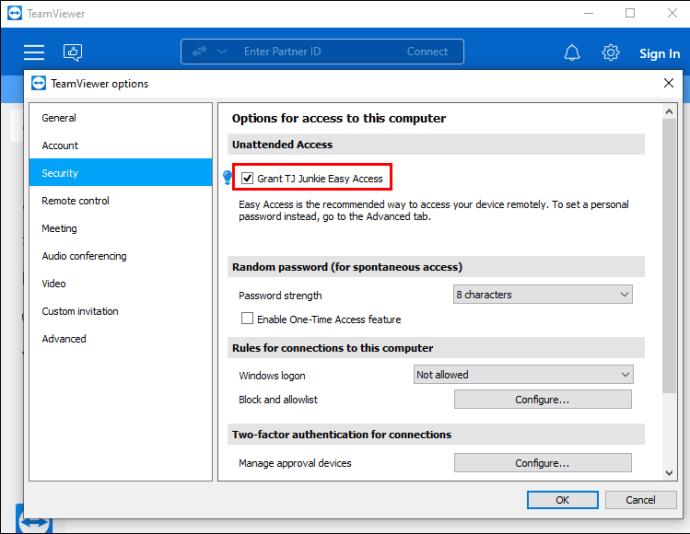
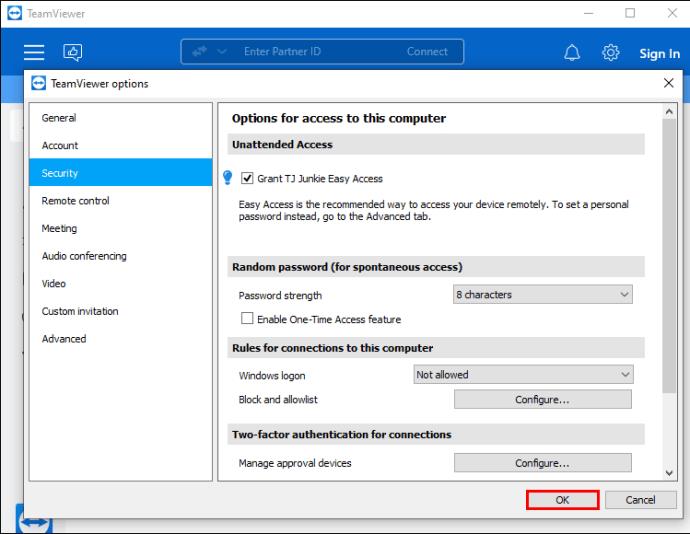
If you’re worried about possible security risks, you should know that Easy Access is very secure. Only an approved account can access a device without a password, and the account itself is protected with two-factor authentication.
How to Add a Computer to TeamViewer for Unattended Access
Users who regularly connect to a device remotely can significantly benefit from the Unattended Access feature. This allows you to access a device at any time without having to put in a password.
Before setting up the Unattended Access feature, you need to ensure the following.
Once everything is set, follow these steps to enable unattended access to that device.
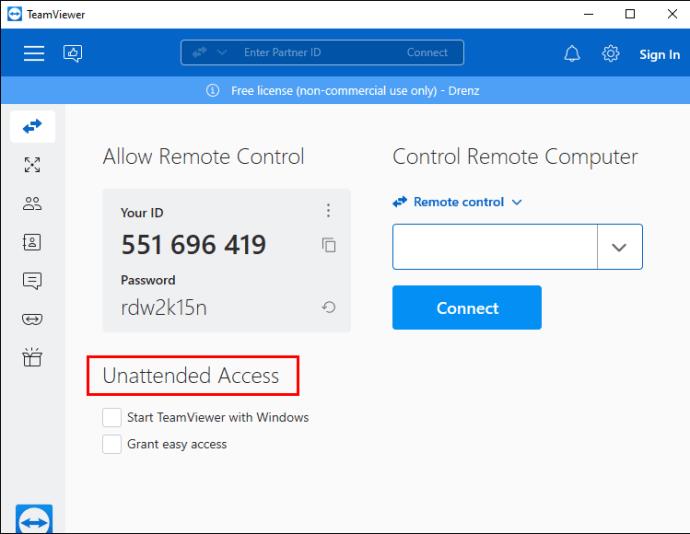
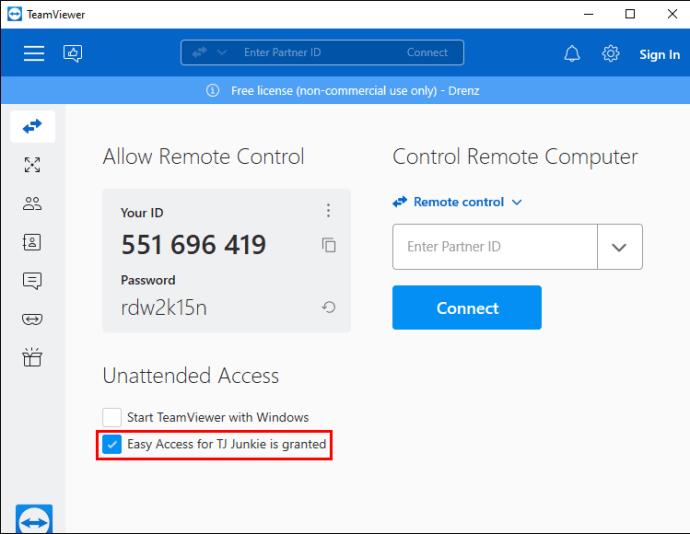
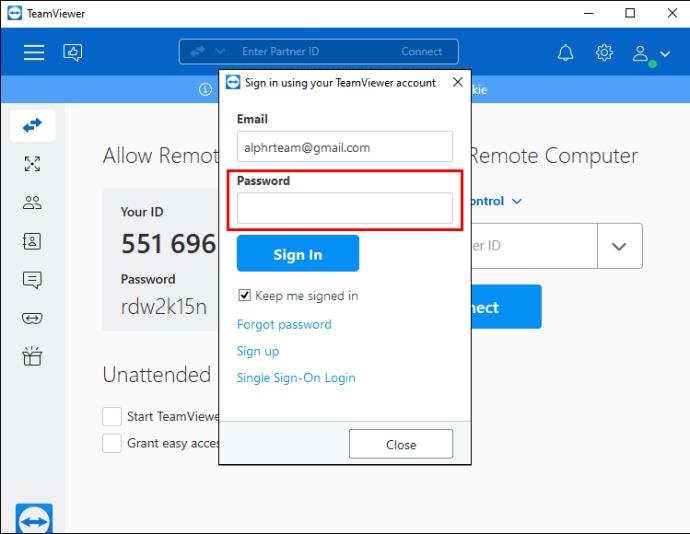
How to Add a Computer by IP to TeamViewer
TeamViewer offers an option to establish a remote control session within your local area network using an IP address. This option can be helpful as it doesn’t require using the internet to connect to your desired device.
If you’d like to add a computer using its IP address, you first have to enable incoming LAN connections.
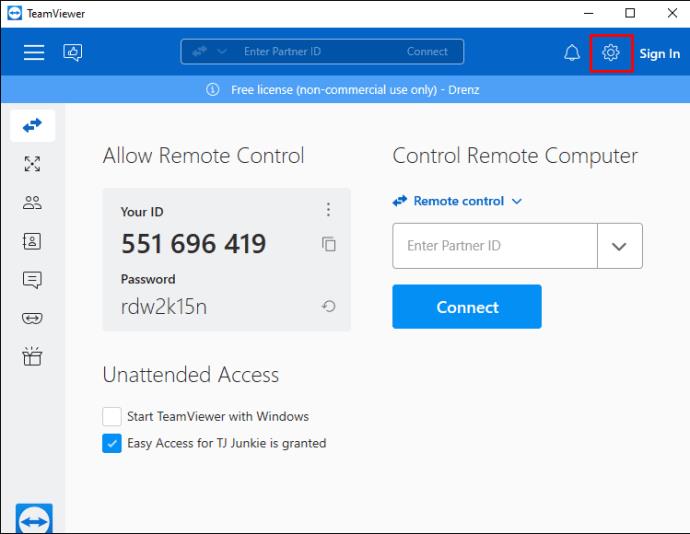

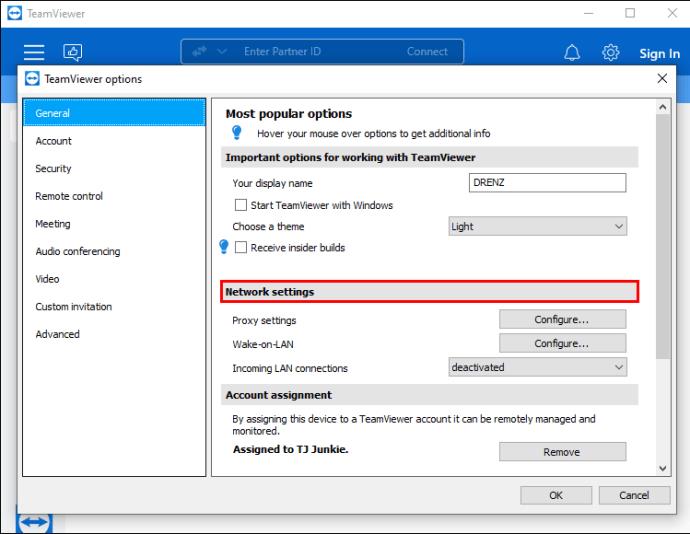
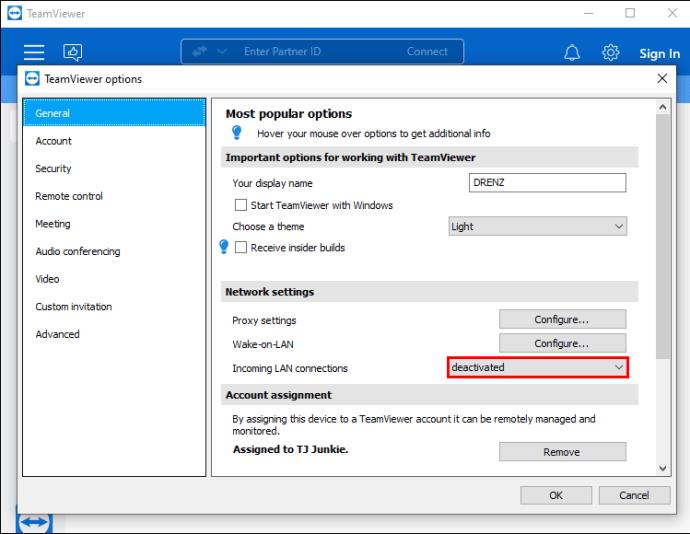
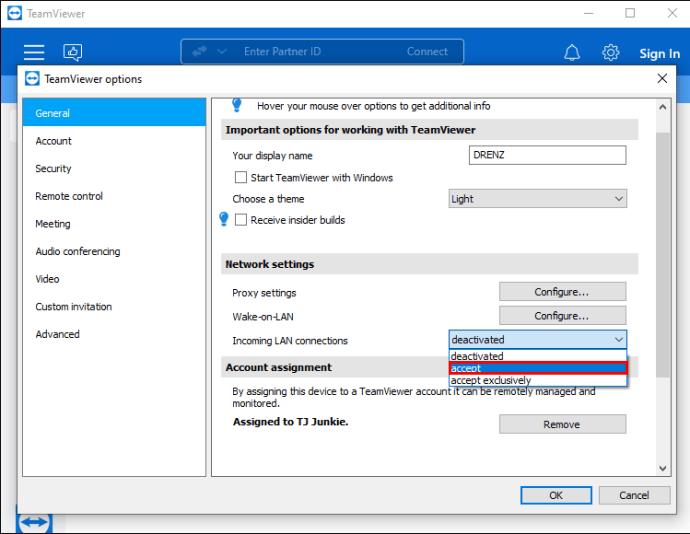
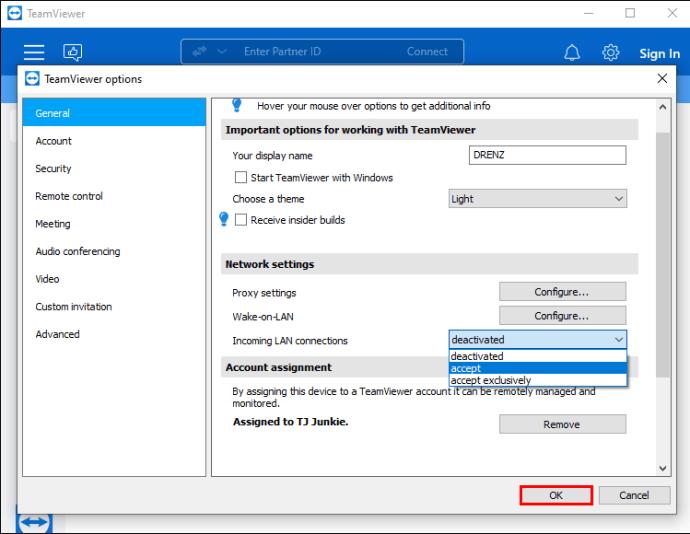
If you choose to accept exclusively, you’ll only be able to connect via the IP address, as the app will disconnect from the internet. When the option is selected, you will see the computer’s internal IP address on the TeamViewer app’s main window.
Once you’ve obtained the IP address, go to the TeamViewer’s Remote Control page. Follow these steps to connect to a device using the IP address.
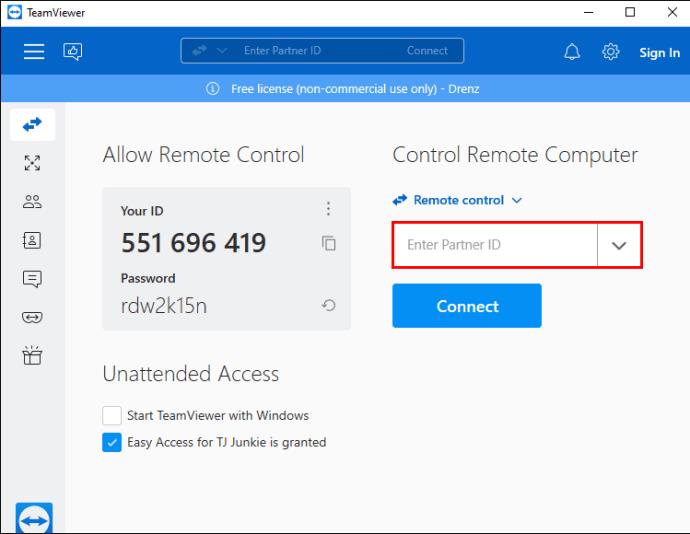
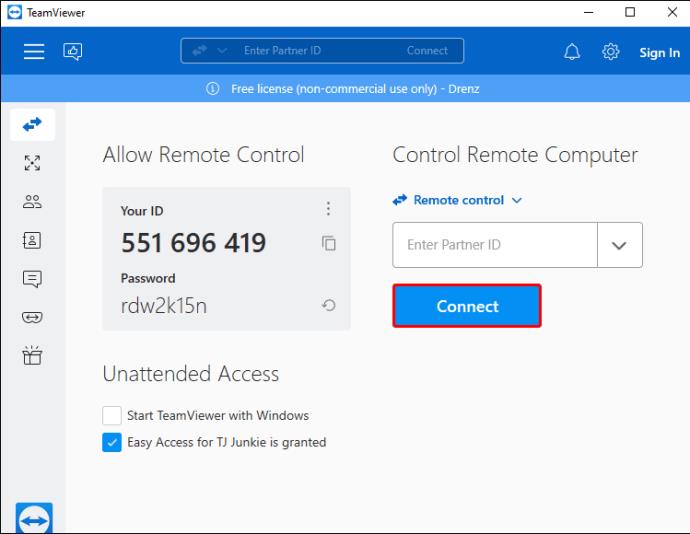
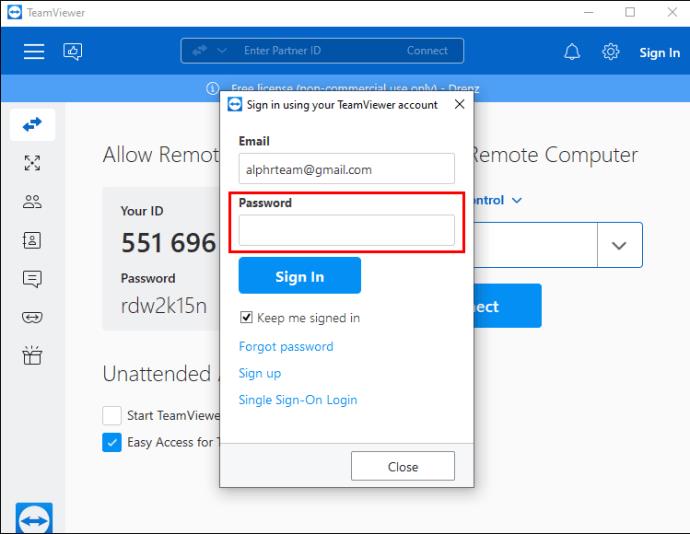
Alternatively, if you choose to accept the incoming LAN connections but not exclusively, the TeamViewer app will remain online. You can connect to a device with both a TeamViewer ID and the IP address.
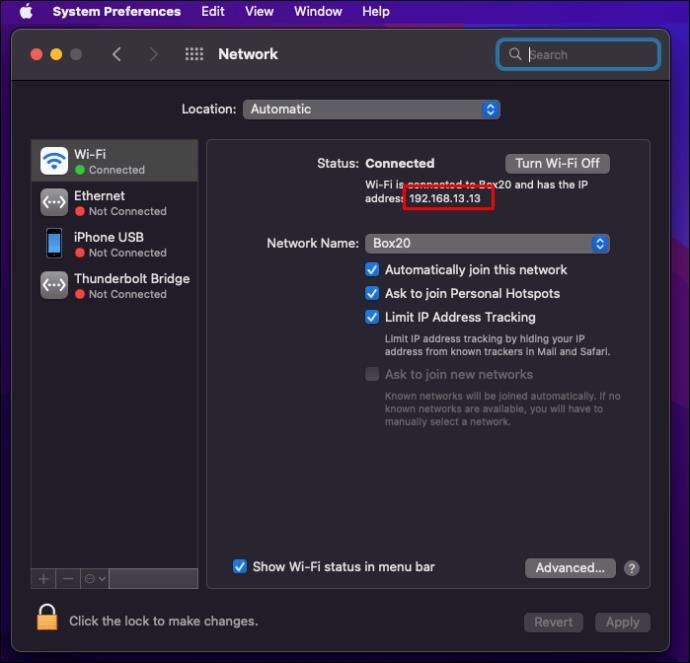
In this case, TeamViewer will not display the computer’s IP address. Instead, you’ll have to locate it yourself.
To find the internal IP address of a Windows computer, do the following.

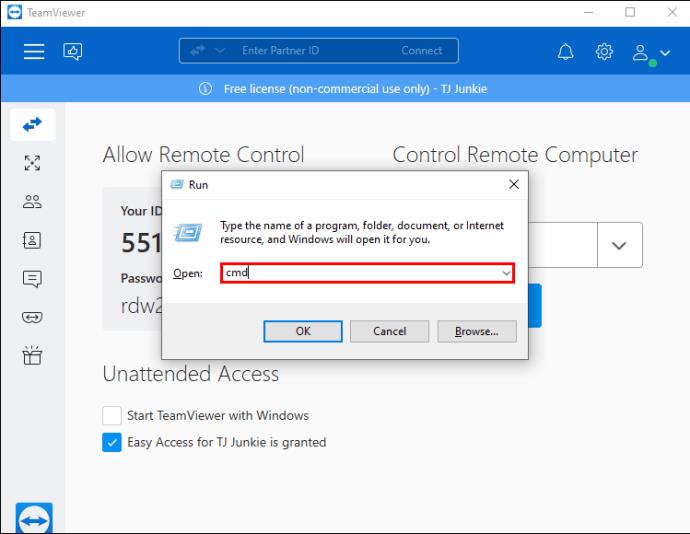

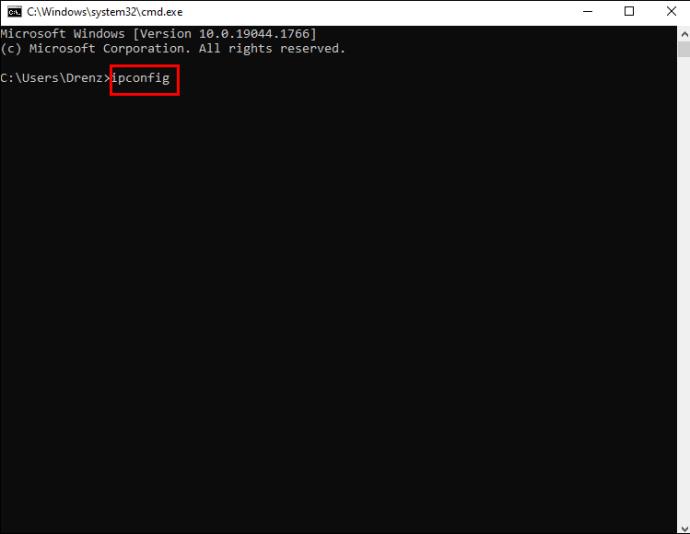
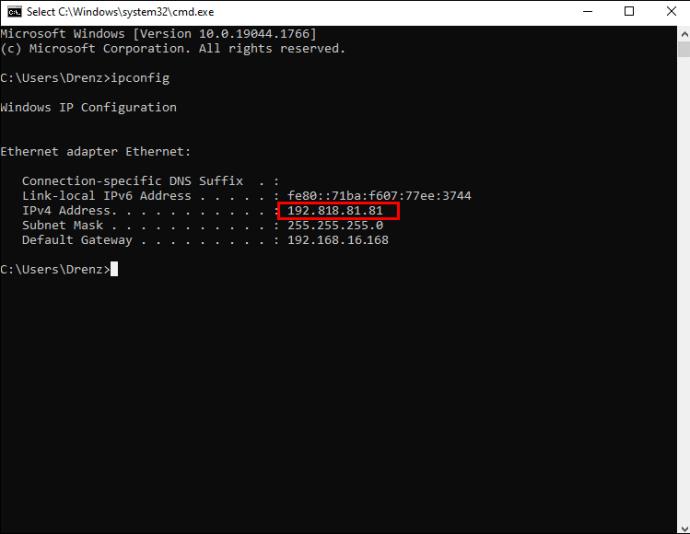
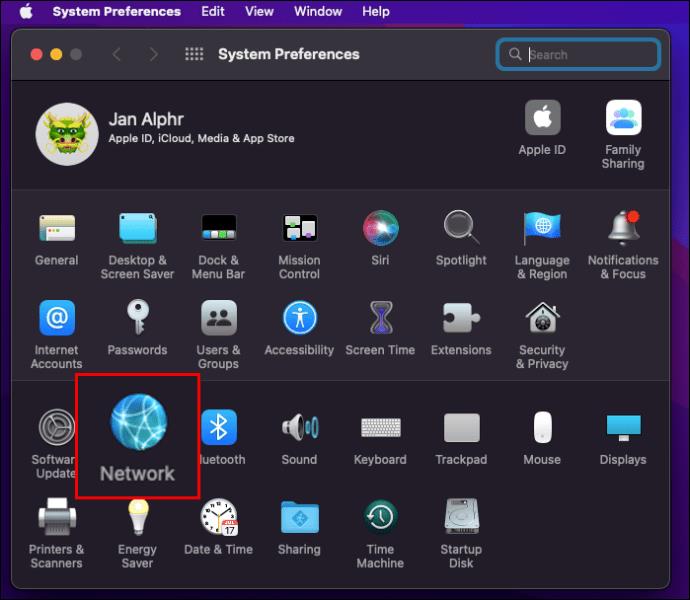
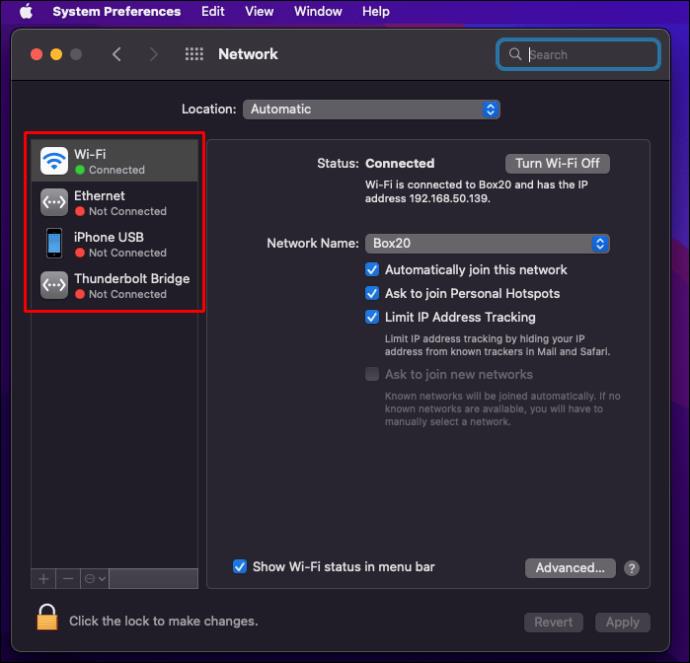
The process is equally as straightforward on a Mac computer.

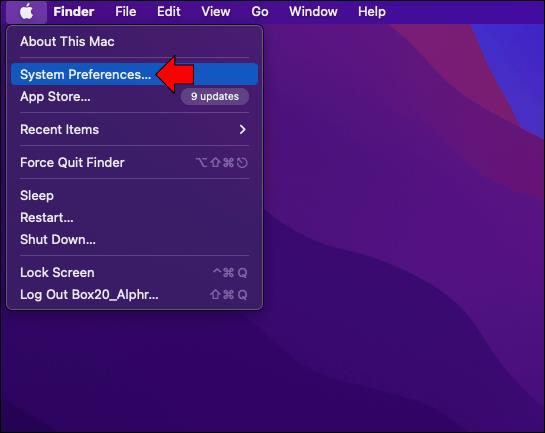
Remote Access Made Easy
Thanks to TeamViewer’s intuitive, all-in-one platform, accessing any device remotely is reasonably straightforward. You might need to work on a client’s computer while they’re beside it. Or perhaps you need to access your office computer when no one’s around. Whatever the case may be, you can quickly add and connect to a new computer using the methods outlined in our guide.
How often do you use TeamViewer to access a device remotely? Do you find the software easy to use? Let us know in the comments section below.
VPNとは何か、そのメリットとデメリットは何でしょうか?WebTech360と一緒に、VPNの定義、そしてこのモデルとシステムを仕事にどのように適用するかについて考えてみましょう。
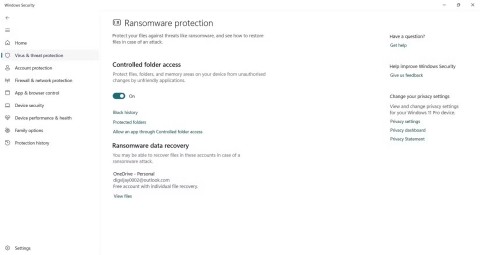
Windows セキュリティは、基本的なウイルス対策だけにとどまりません。フィッシング詐欺の防止、ランサムウェアのブロック、悪意のあるアプリの実行防止など、様々な機能を備えています。しかし、これらの機能はメニューの階層構造に隠れているため、見つけにくいのが現状です。
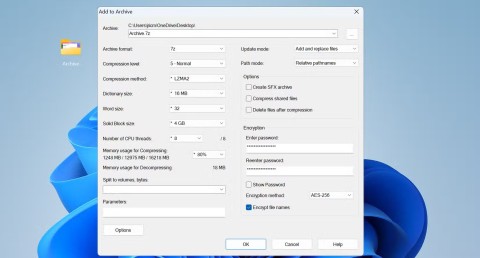
一度学んで実際に試してみると、暗号化は驚くほど使いやすく、日常生活に非常に実用的であることがわかります。
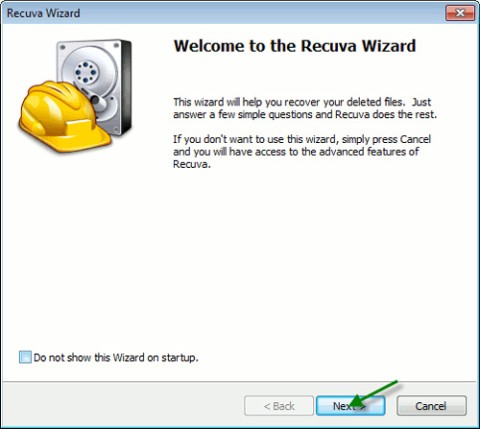
以下の記事では、Windows 7で削除されたデータを復元するためのサポートツールRecuva Portableの基本操作をご紹介します。Recuva Portableを使えば、USBメモリにデータを保存し、必要な時にいつでも使用できます。このツールはコンパクトでシンプルで使いやすく、以下のような機能を備えています。
CCleaner はわずか数分で重複ファイルをスキャンし、どのファイルを安全に削除できるかを判断できるようにします。
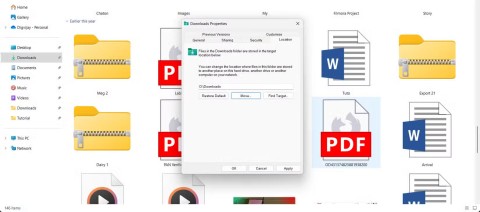
Windows 11 でダウンロード フォルダーを C ドライブから別のドライブに移動すると、C ドライブの容量が削減され、コンピューターの動作がスムーズになります。
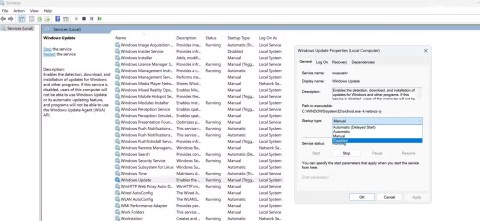
これは、Microsoft ではなく独自のスケジュールで更新が行われるように、システムを強化および調整する方法です。
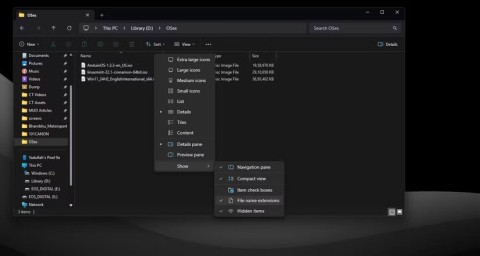
Windows ファイルエクスプローラーには、ファイルの表示方法を変更するためのオプションが多数用意されています。しかし、システムのセキュリティにとって非常に重要なオプションが、デフォルトで無効になっていることをご存知ない方もいるかもしれません。
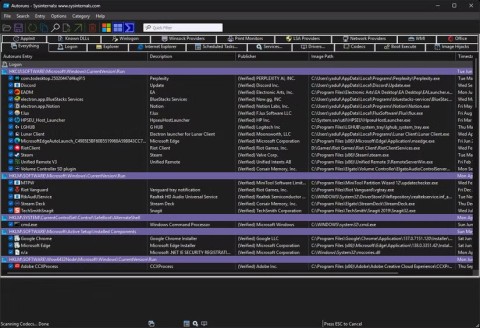
適切なツールを使用すれば、システムをスキャンして、システムに潜んでいる可能性のあるスパイウェア、アドウェア、その他の悪意のあるプログラムを削除できます。
以下は、新しいコンピュータをインストールするときに推奨されるソフトウェアのリストです。これにより、コンピュータに最も必要な最適なアプリケーションを選択できます。
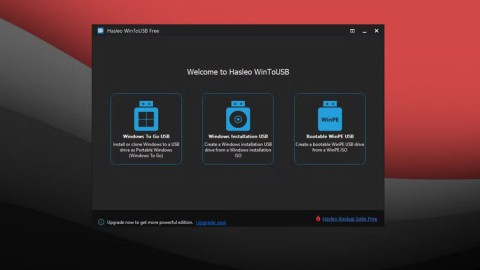
フラッシュドライブにオペレーティングシステム全体を保存しておくと、特にノートパソコンをお持ちでない場合、非常に便利です。しかし、この機能はLinuxディストリビューションに限ったものではありません。Windowsインストールのクローン作成に挑戦してみましょう。
これらのサービスのいくつかをオフにすると、日常の使用に影響を与えずに、バッテリー寿命を大幅に節約できます。
Ctrl + Z は、Windows で非常によく使われるキーの組み合わせです。基本的に、Ctrl + Z を使用すると、Windows のすべての領域で操作を元に戻すことができます。
短縮URLは長いリンクを簡潔にするのに便利ですが、実際のリンク先を隠すことにもなります。マルウェアやフィッシング詐欺を回避したいのであれば、盲目的にリンクをクリックするのは賢明ではありません。
長い待ち時間の後、Windows 11 の最初のメジャー アップデートが正式にリリースされました。
